How to Register and Verify Account on Exness
To start trading on Exness, you'll need to register and verify your account. This process ensures the security of your funds and compliance with regulatory standards.
In this guide, we’ll walk you through the steps to register and verify your Exness account, helping you get started on your trading journey efficiently and securely.
How to Register an Account on Exness
How to Register Exness Account [Web]
How to Register an account
1. To register an account with Exness visit our website and click on the “Open account” button in the top right corner of the website.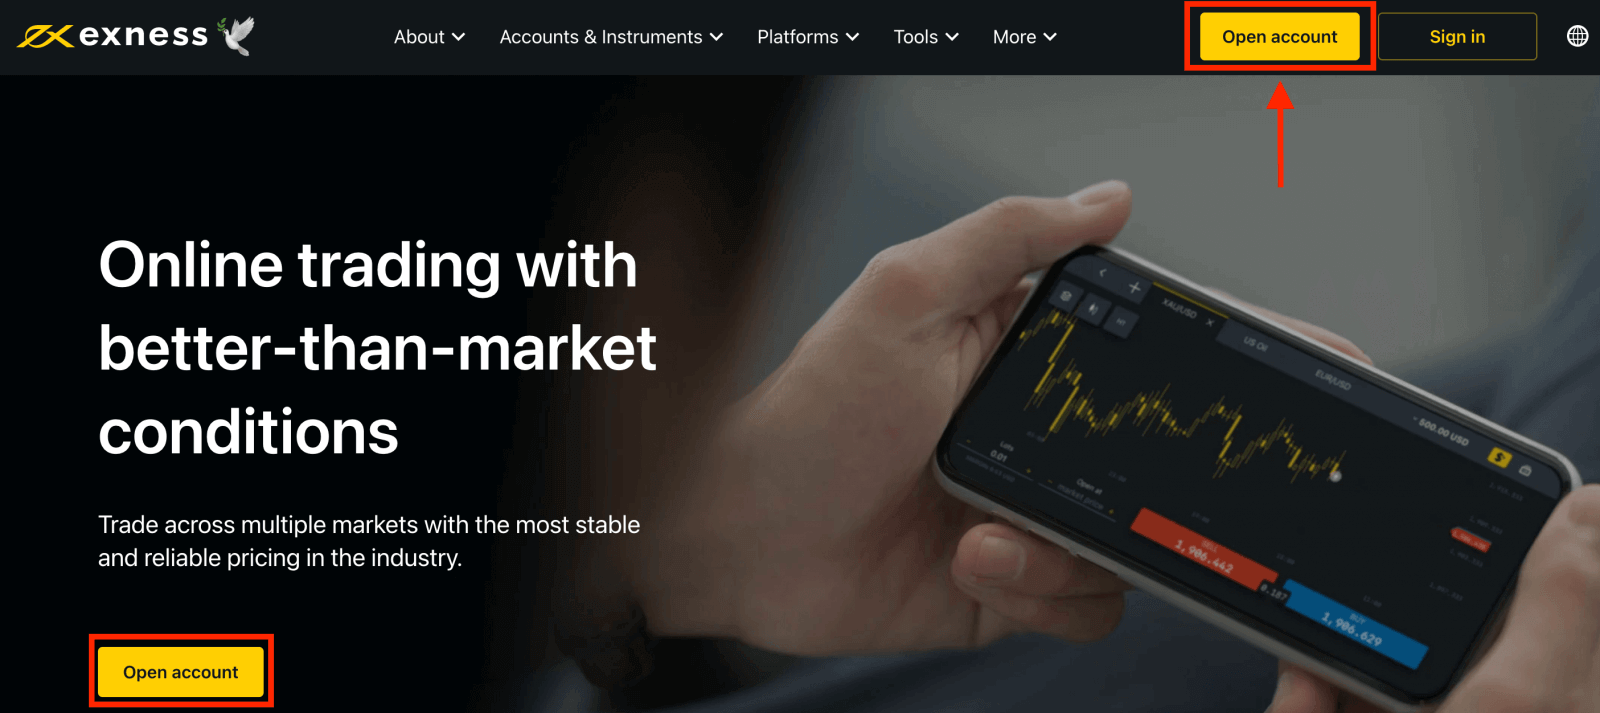
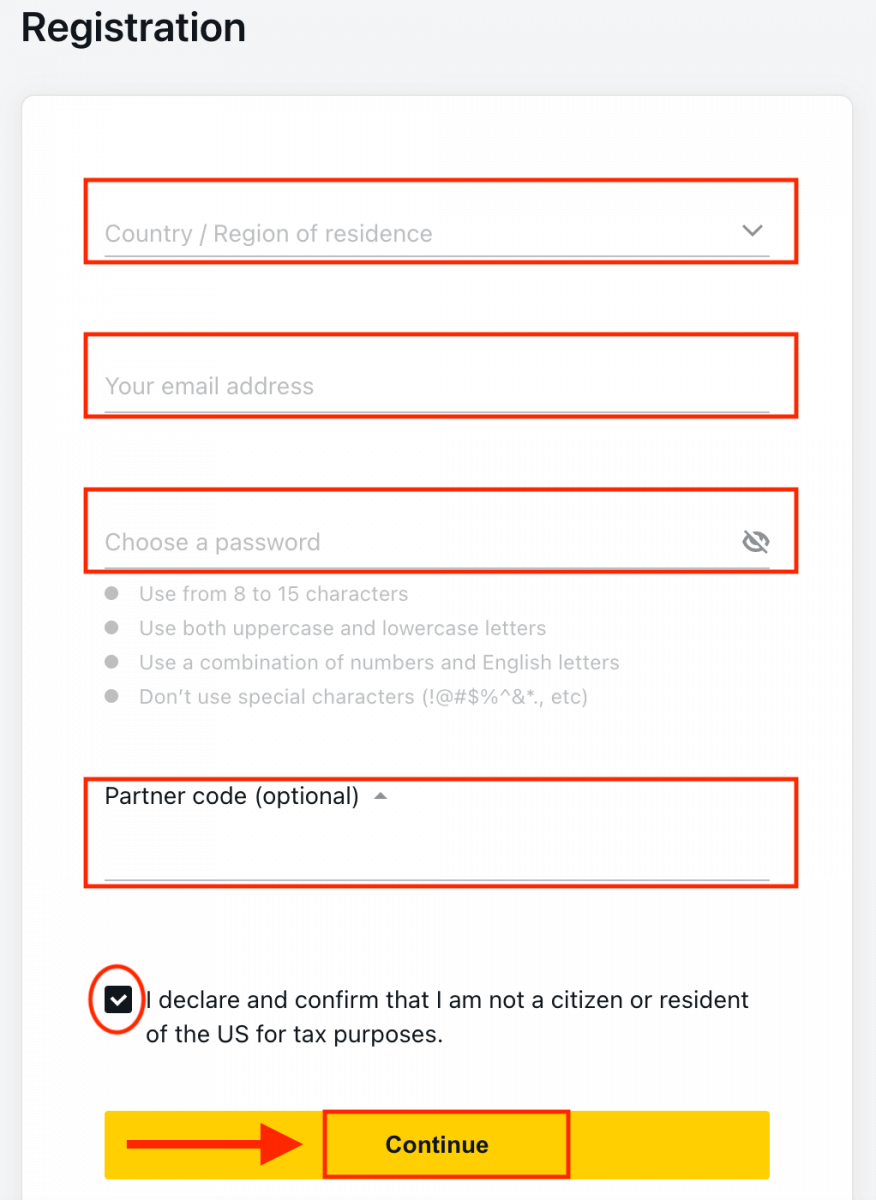
2. At the registration page, complete the following actions:
- Select your country of residence; this cannot be changed and will dictate which payment services are available to you.
- Enter your email address.
- Create a password for your Exness account following the guidelines shown.
- Enter a partner code (optional), which will link your Exness account to a partner in the Exness Partnership program.
- Note: in the case of an invalid partner code, this entry field will be cleared so that you can try again.
- Tick the box declaring you are not a citizen or resident of the US if this applies to you.
- Click Continue once you have provided all the required information.
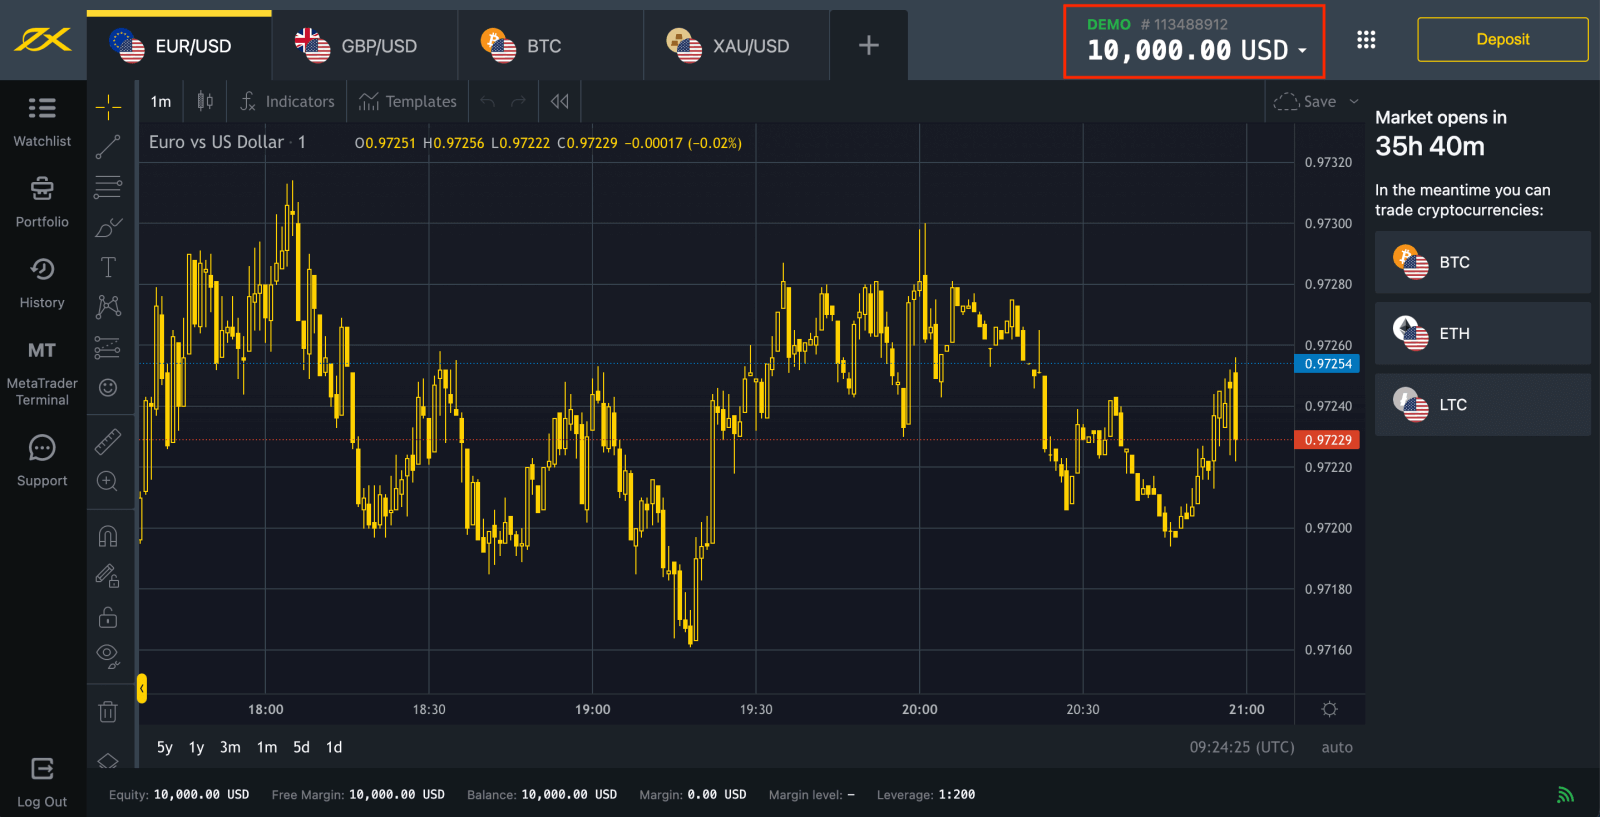
3. Congratulations, you have successfully registered a new Exness Account and will be taken to Exness Terminal. Click the "Demo Account" button to trade with the Demo account.
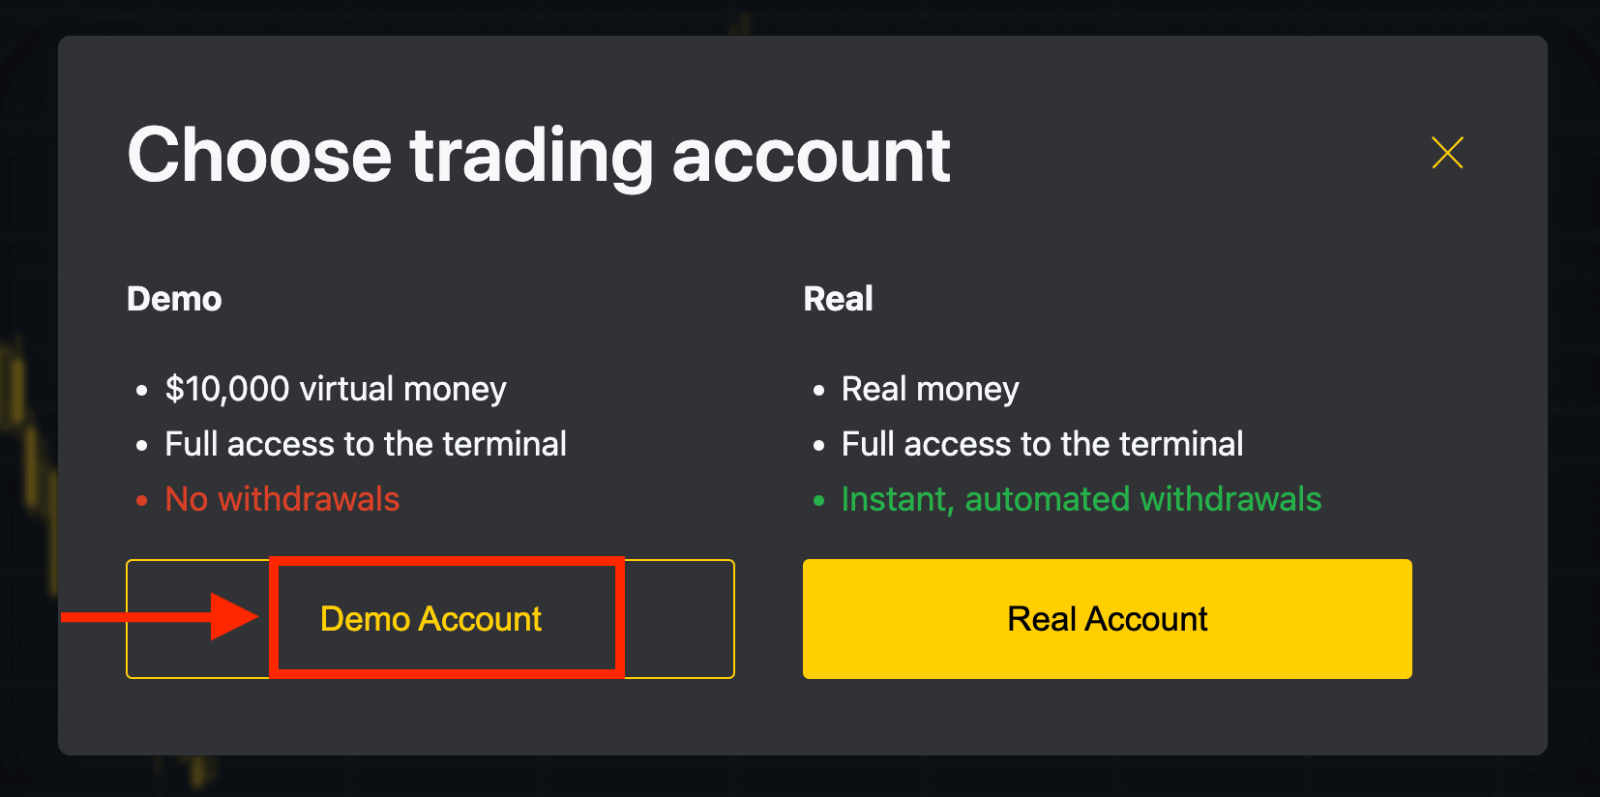
Now you don’t need any registration to open a demo account. $10,000 in a Demo account allows you to practice as much as you need for free. Using a Demo account is an excellent way to learn how to trade and grasp everything much faster without being afraid of losing your own funds.
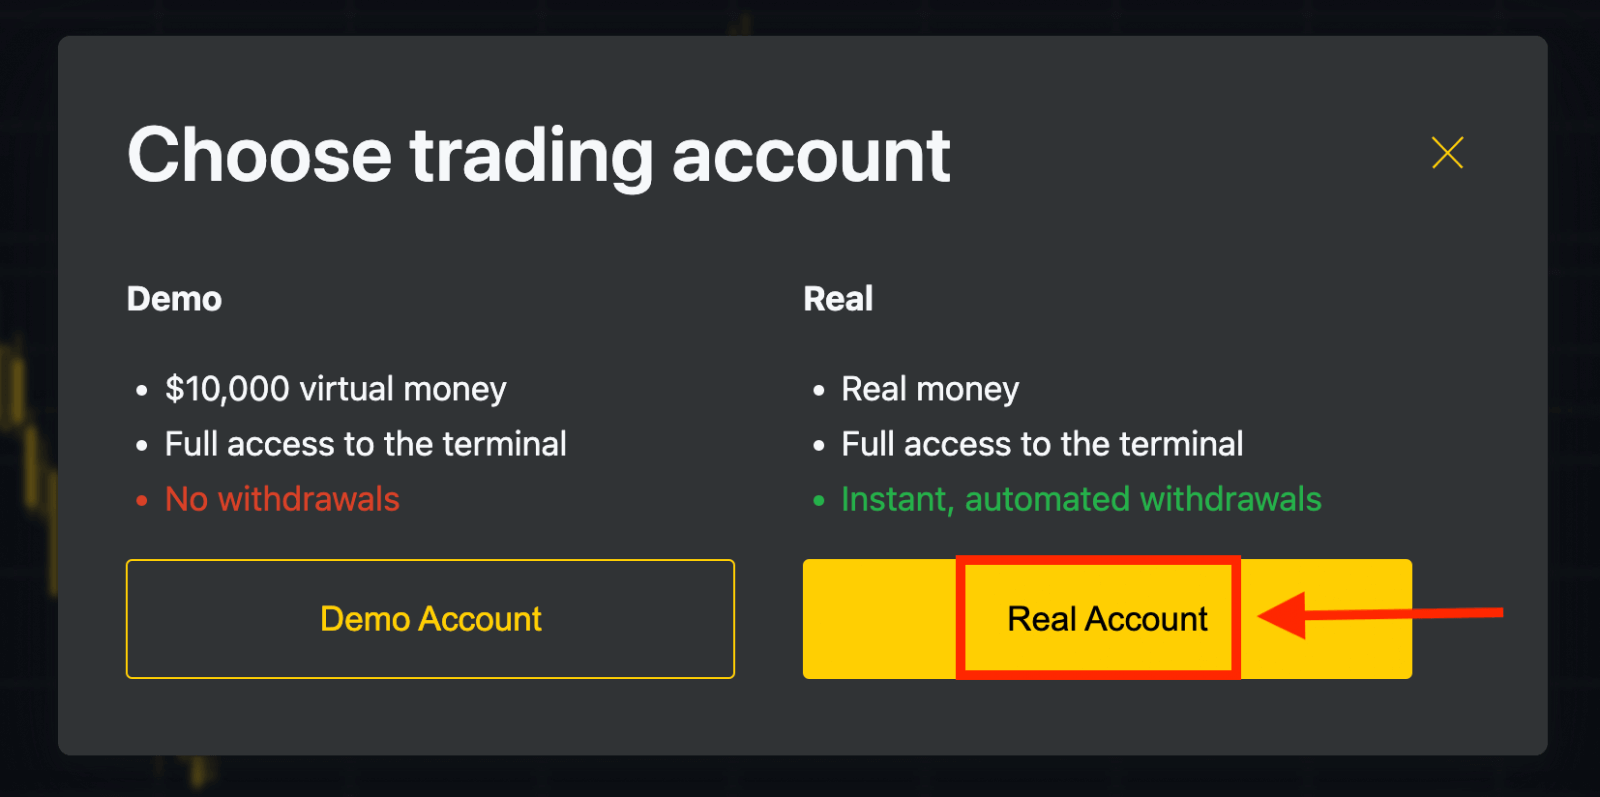
Or click the "Real Account" yellow button to trade with a real account.
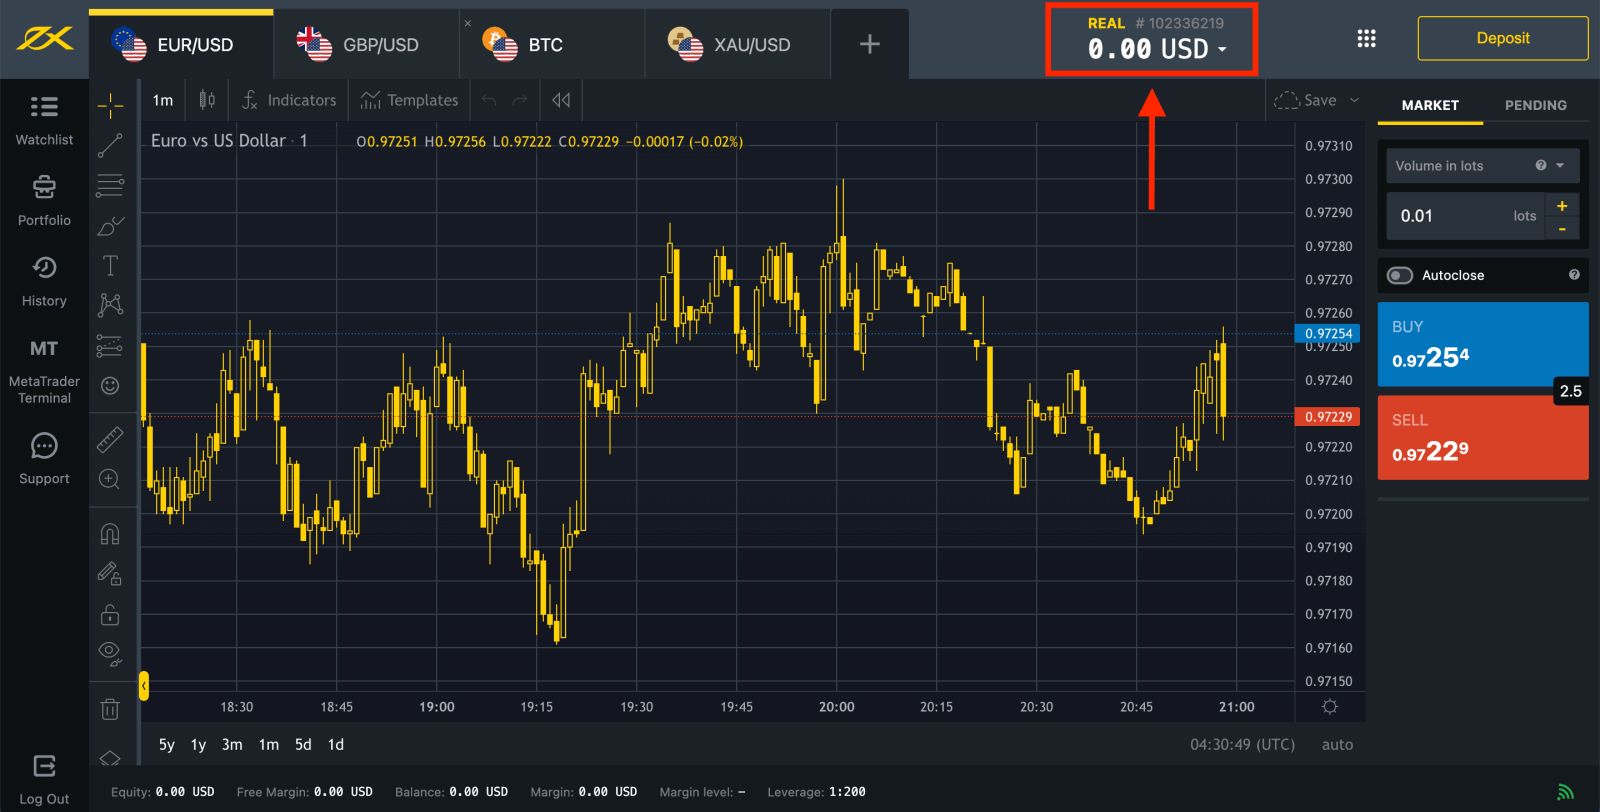
Go to Personal Area to open more trading accounts.
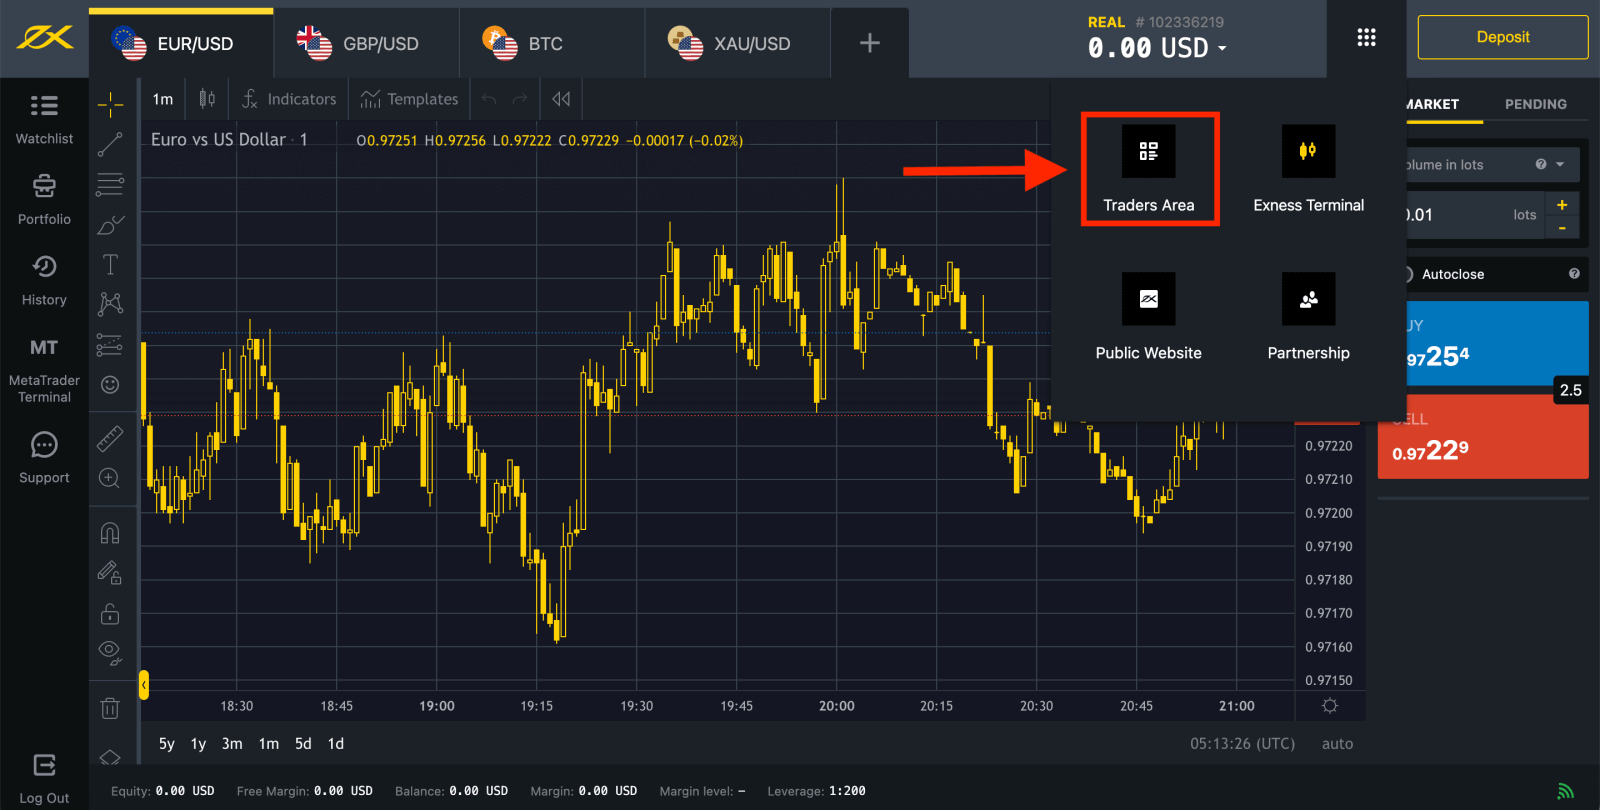
By default, a real trading account and a demo trading account (both for MT5) are created in your new Personal Area; but it is possible to open new trading accounts.
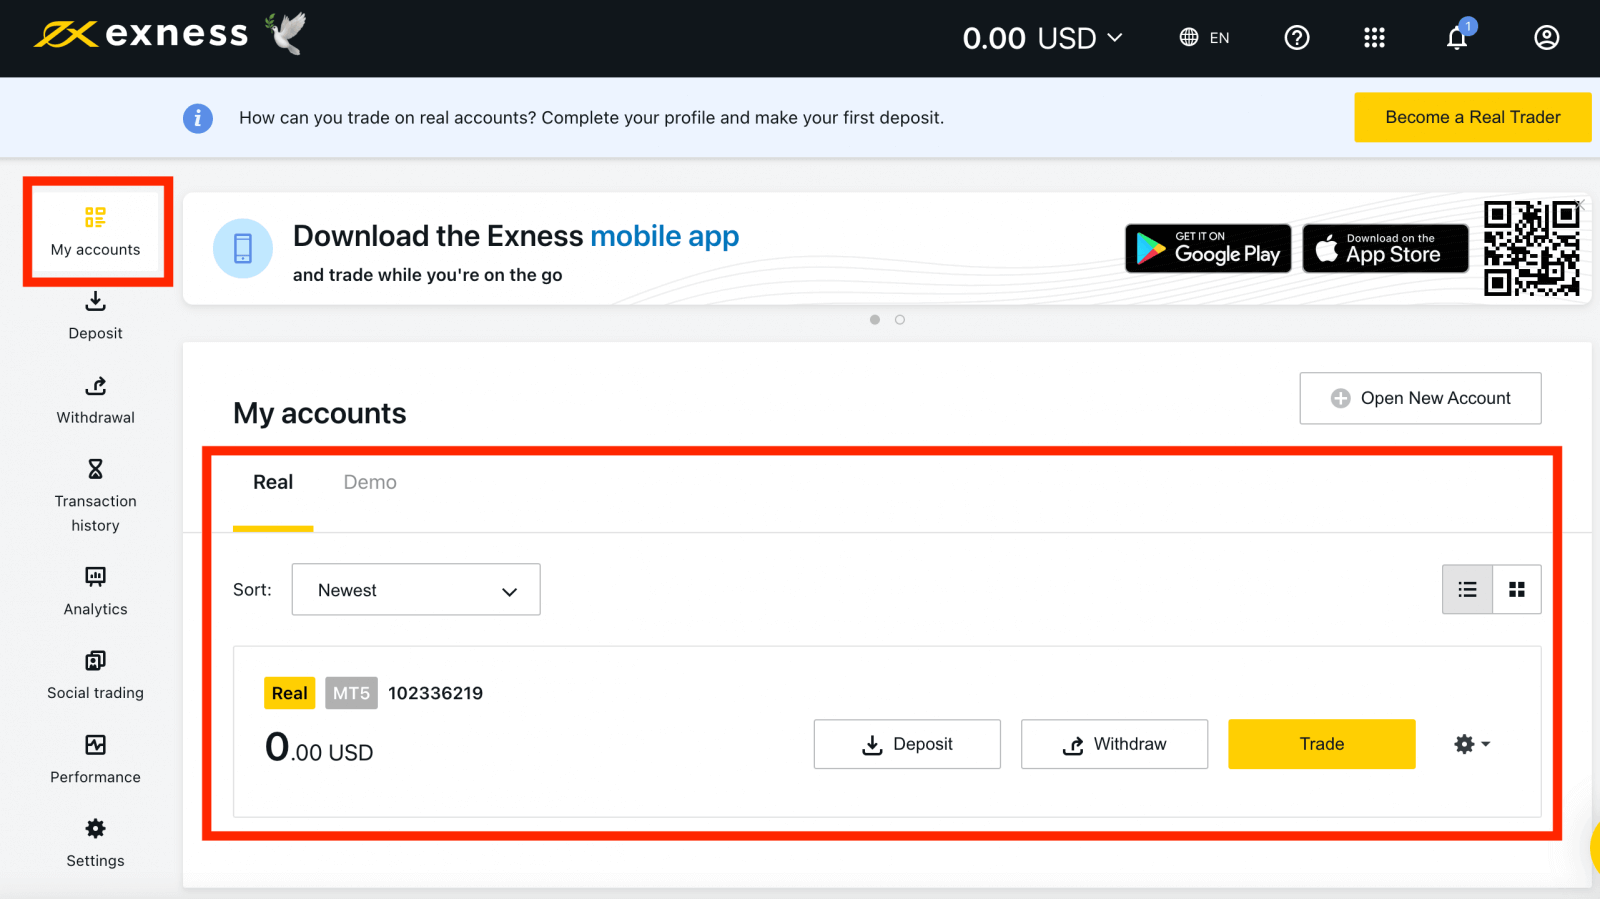
Registering with Exness can be done at any time, even right now!
Once you have registered, it is advised that you fully verify your Exness account to gain access to every feature available only to fully verified Personal Areas.
How to create a new trading account
Create a new trading account by doing the steps below:
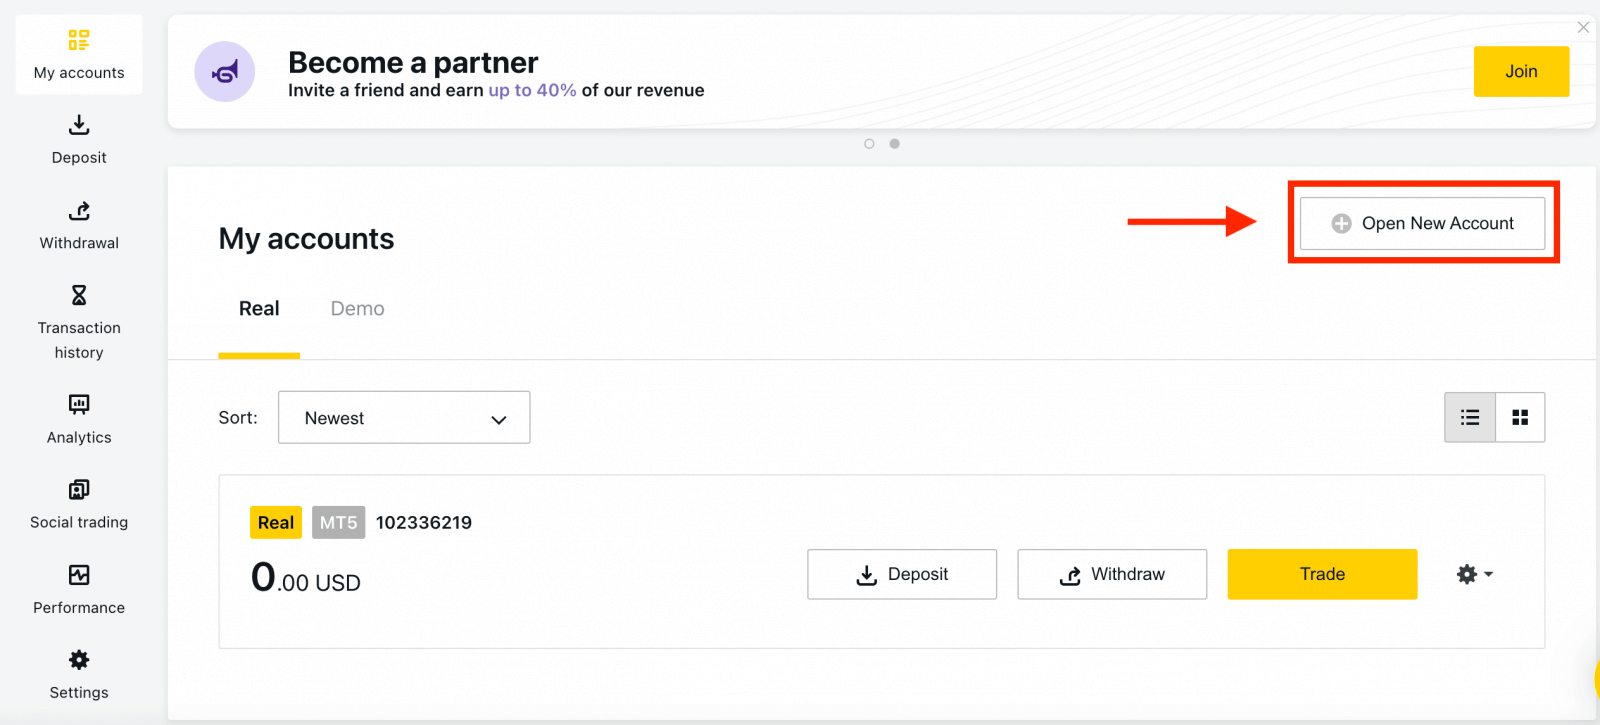
1. From your new Personal Area, click Open New Account in the ‘My Accounts’ area.
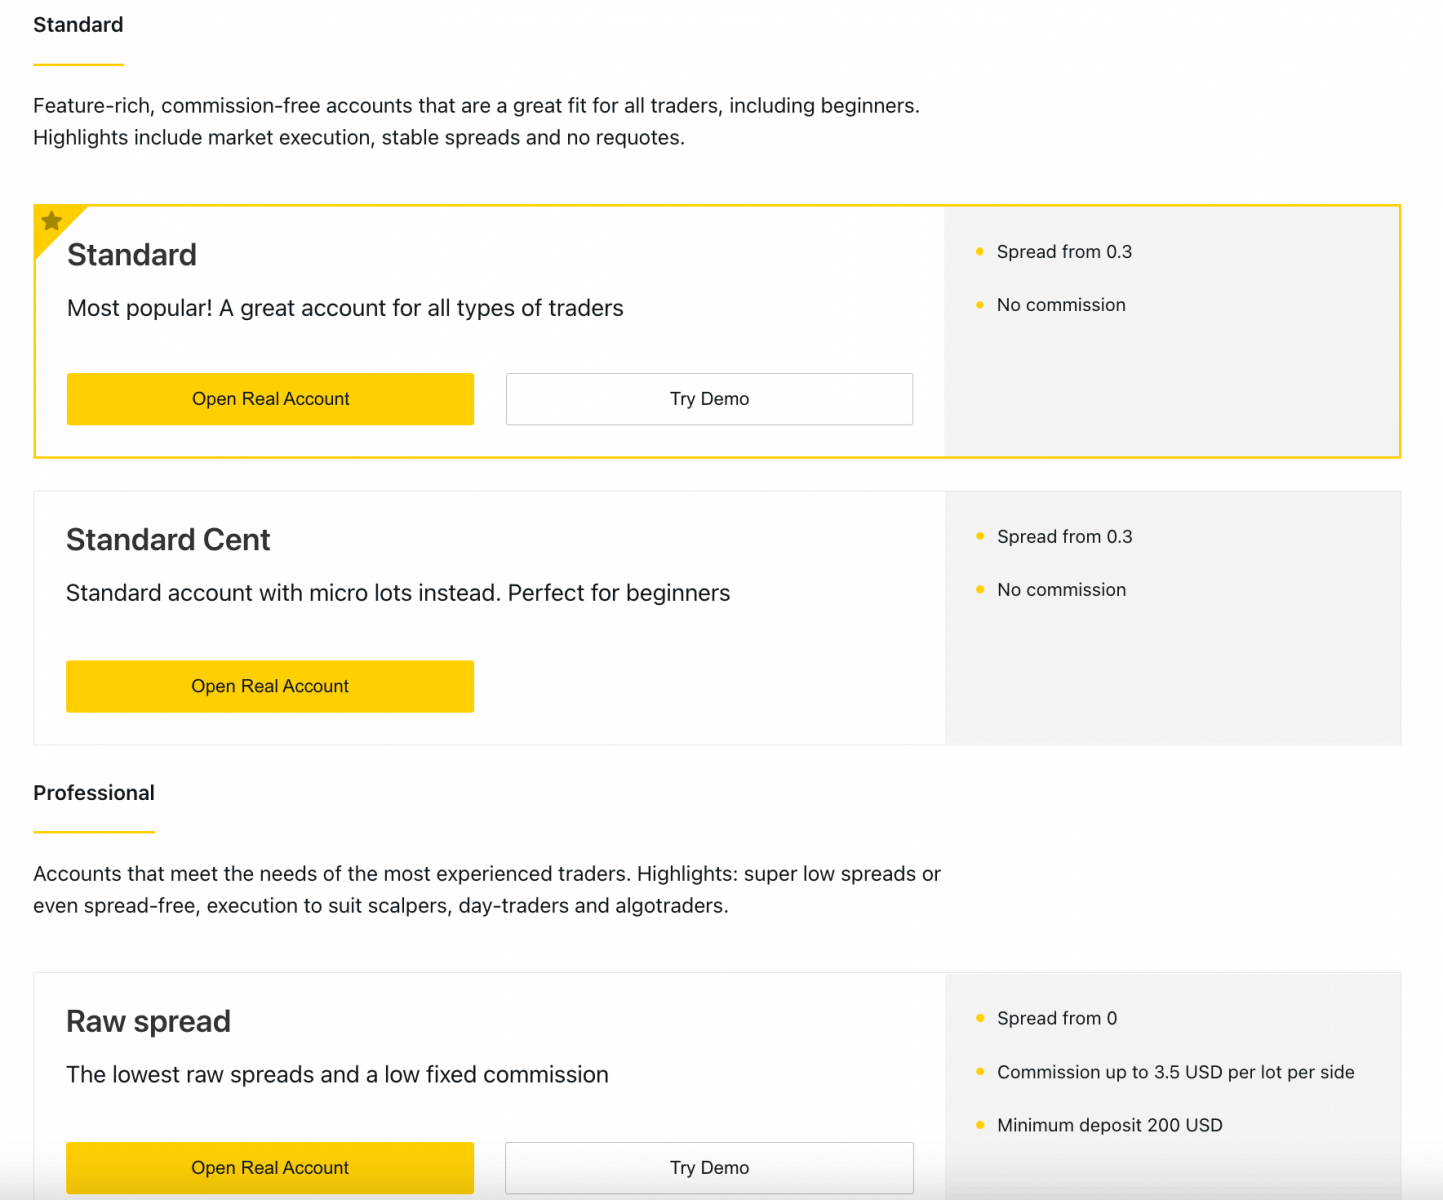
2. Choose from the available trading account types, and whether you prefer a real or demo account.
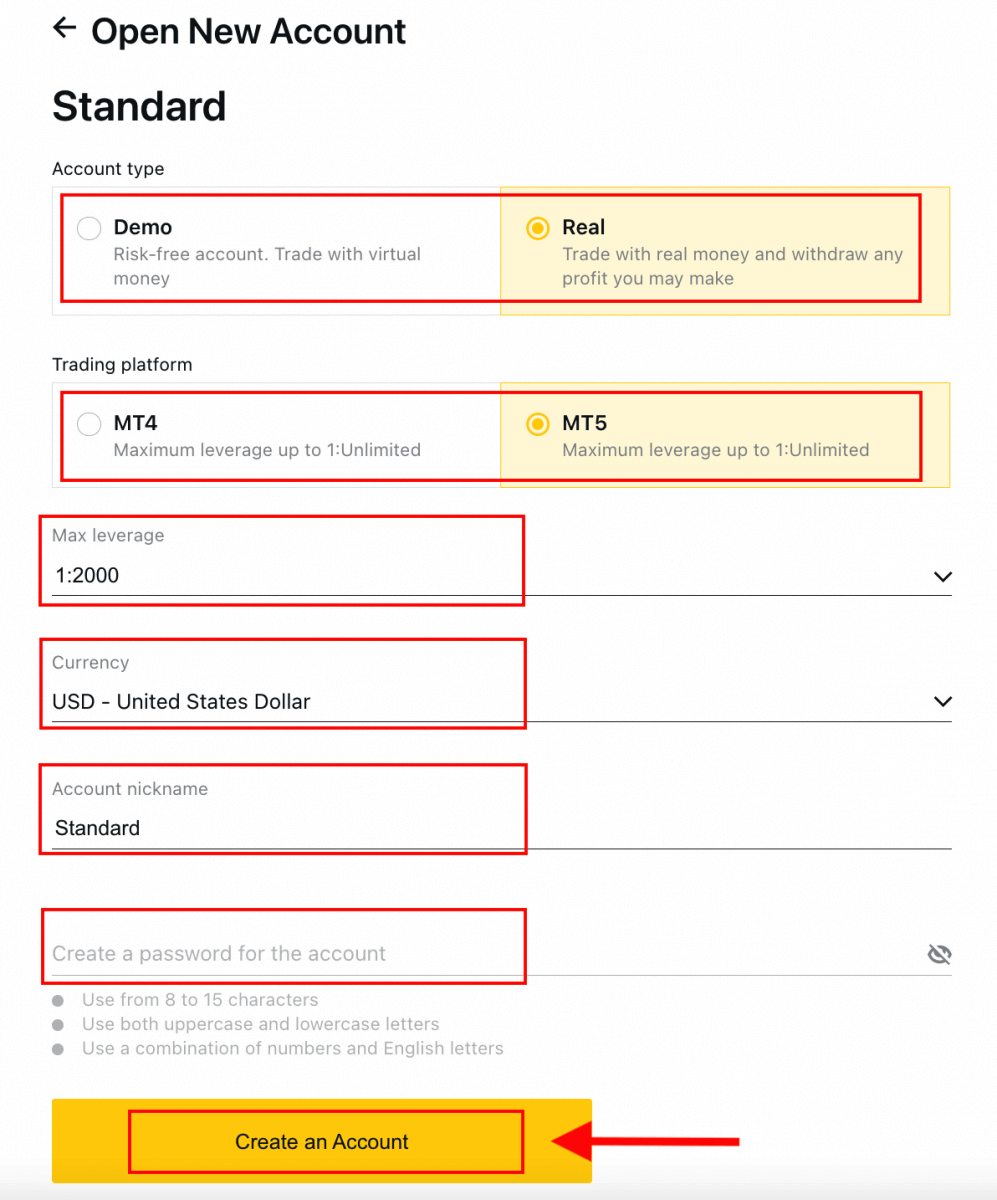
3. The next screen presents the following settings:
- Another chance to select a Real or Demo account.
- A choice between MT4 and MT5 trading terminals.
- Set your Max Leverage.
- Choose your account currency (note that this cannot be changed for this trading account once set).
- Create a nickname for this trading account.
- Set a trading account password.
- Click Create an Account once you are satisfied with your settings.
4. Your new trading account will show up in the ‘My Accounts’ tab.
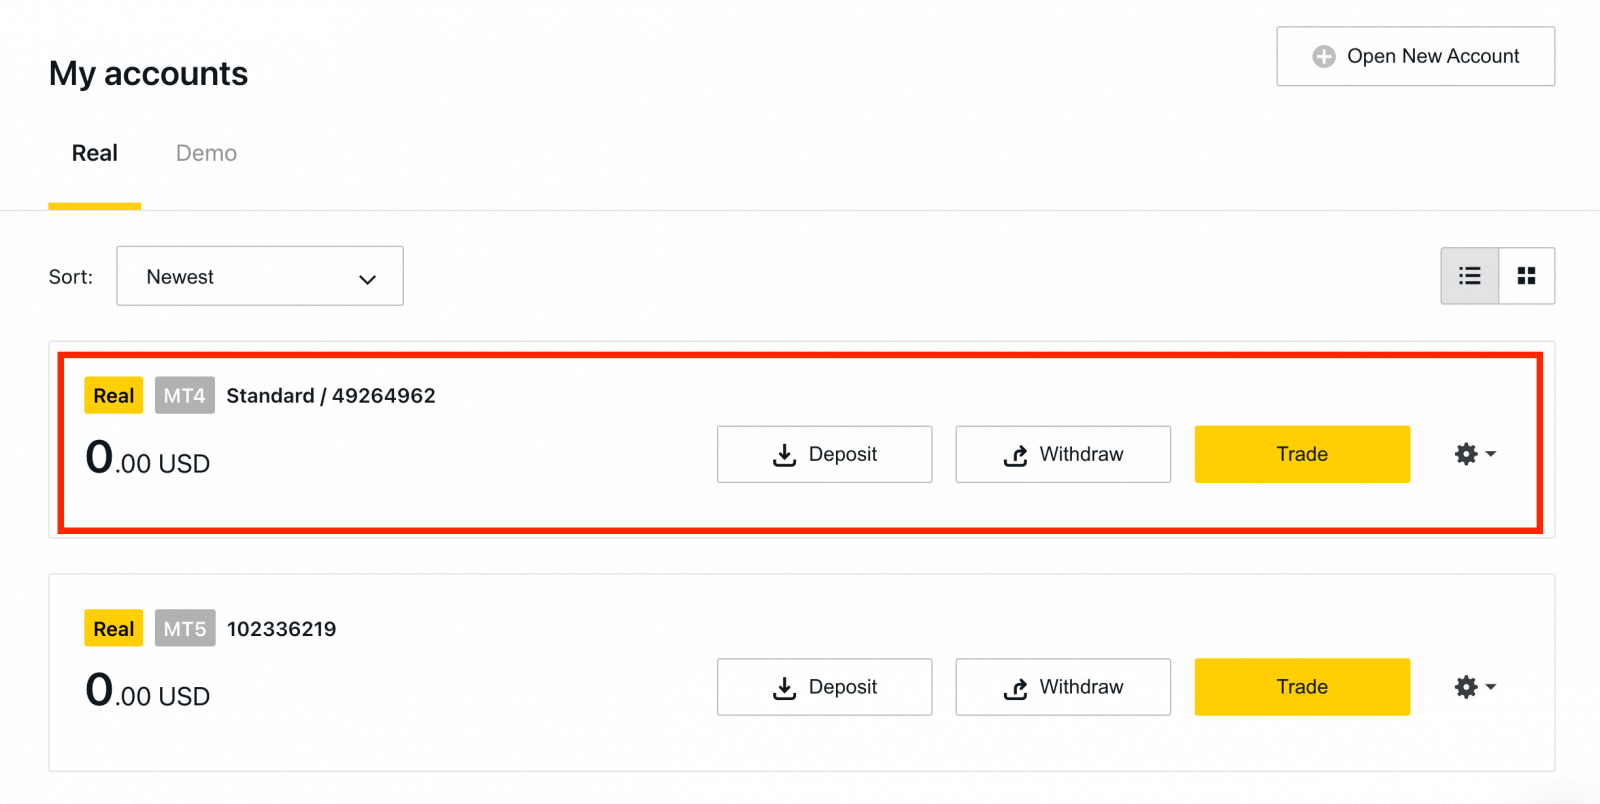
Congratulations, you’ve opened a new trading account.
How to Deposit in Exness
How to Register Exness Account [App]
Set up and Register an account
1. You need to download the Exness Trader application from the App Store or Google Play.2. Install and load Exness Trader.
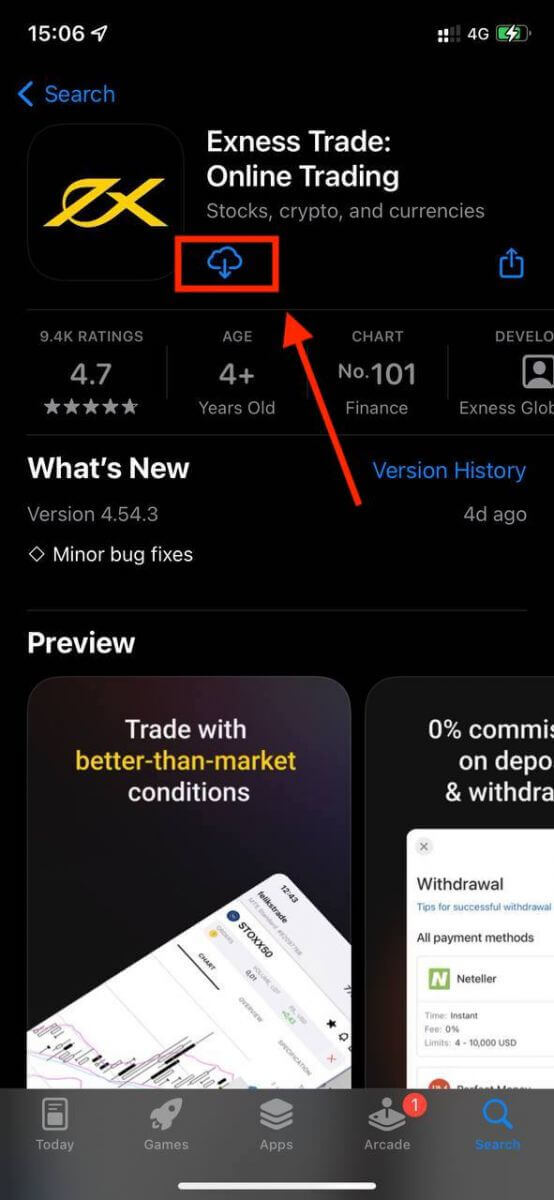
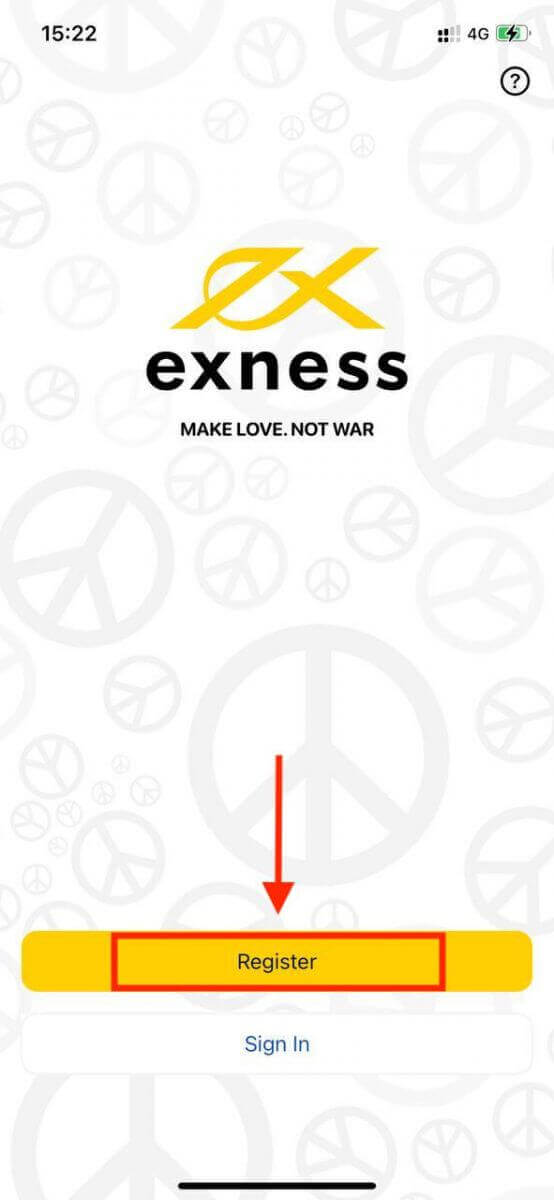
3. Tap Register.
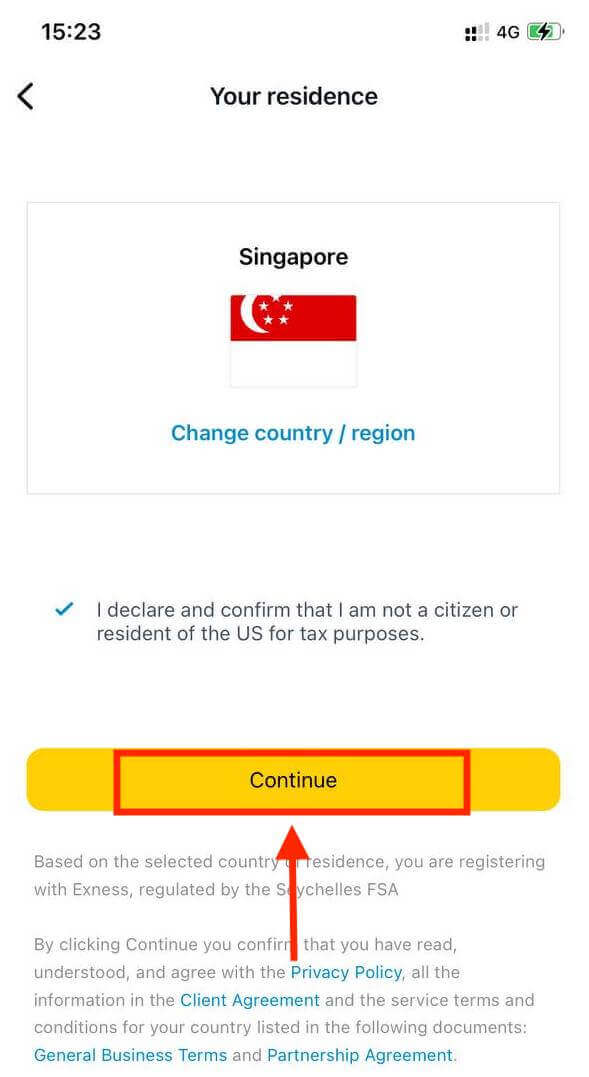
4. Tap Change Country/Region to select your country of residence from the list, then tap Continue.
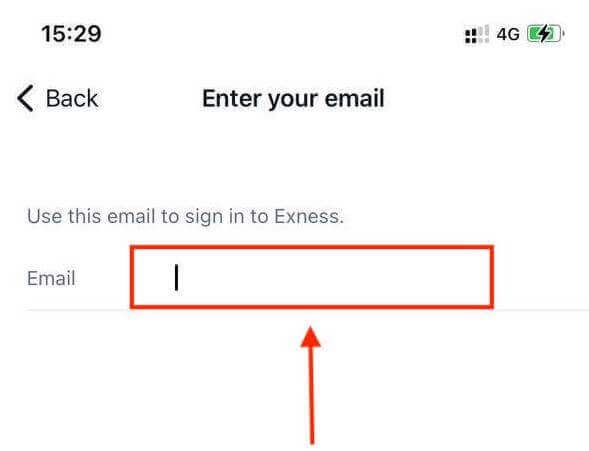
5. Enter your email address and Continue.
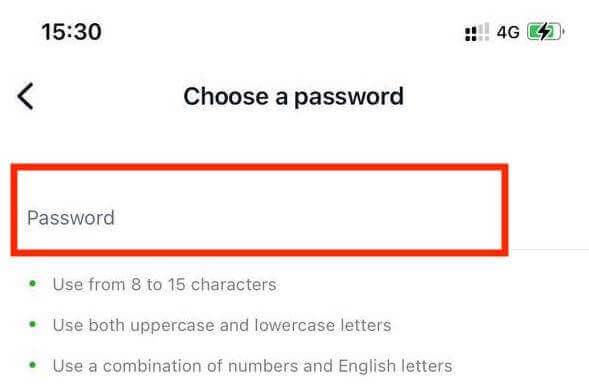
6. Create a password that meets the requirements. Tap Continue.
7. Provide your phone number and tap Send me a code.
8. Enter the 6-digit verification code sent to your phone number, then tap Continue. You can tap Resend me a code if the time runs out.
9. Create a 6-digit passcode, and then re-enter it to confirm. This is not optional, and must be completed before you can enter Exness Trader.
10. You can set up biometrics by tapping Allow if your device supports it, or you can skip this step by tapping Not now.
11. The deposit screen will be presented, but you can tap back to return to the main area of the app.
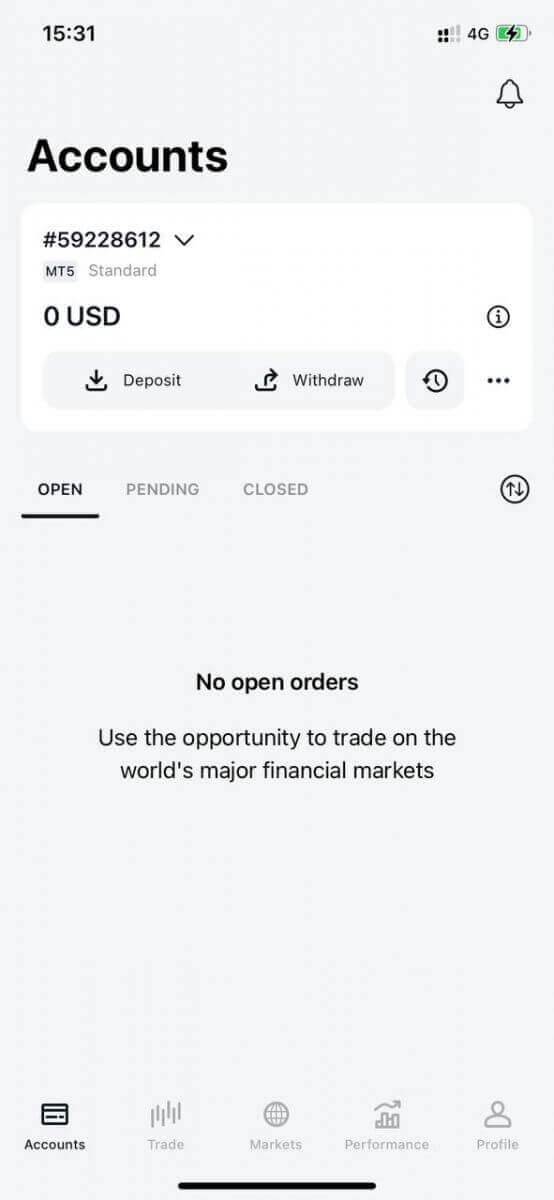
Congratulations, Exness Trader is set up and ready to use.
Upon registration, a demo account is created for you (with USD 10 000 virtual funds) to practice trading. You don’t have to spend your own money on trading right away. We offer practice demo accounts, which will let you test investing with virtual money using real market data.
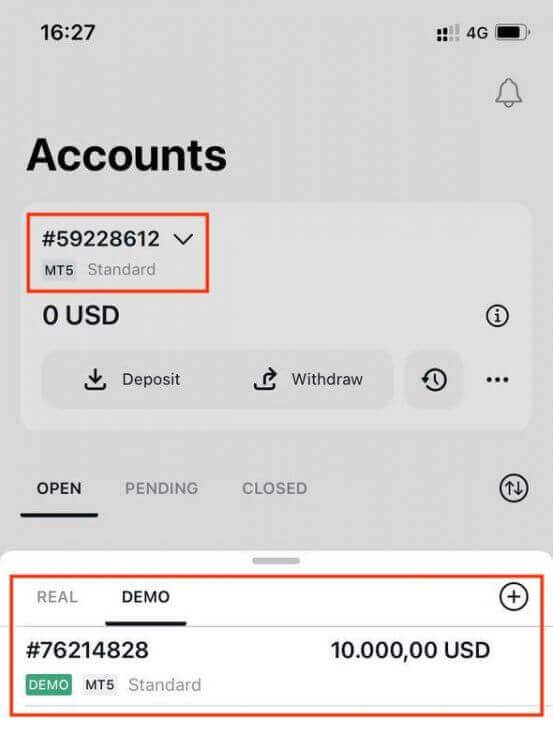
Along with a demo account, a real account is also created for you upon registration.
How to create a new trading account
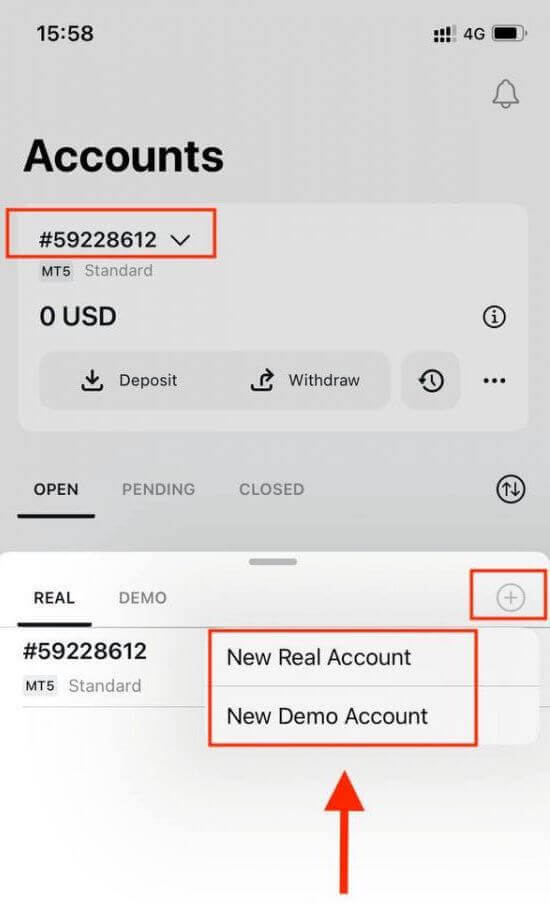
Once you have registered your Personal Area, Let us take you through how to create an account on the Exness Trader App.1. Tap on the dropdown menu on your Accounts tab on your main screen.
2. Click on the plus sign on the right side and select New Real Account or New Demo Account.
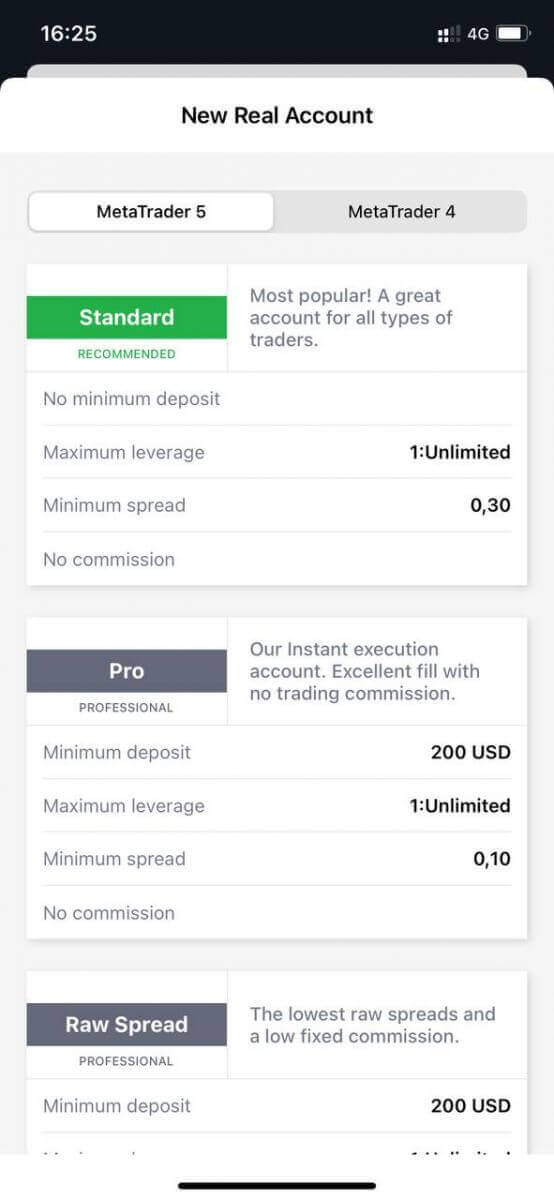
3. Choose your preferred account type under MetaTrader 5 and MetaTrader 4 fields.
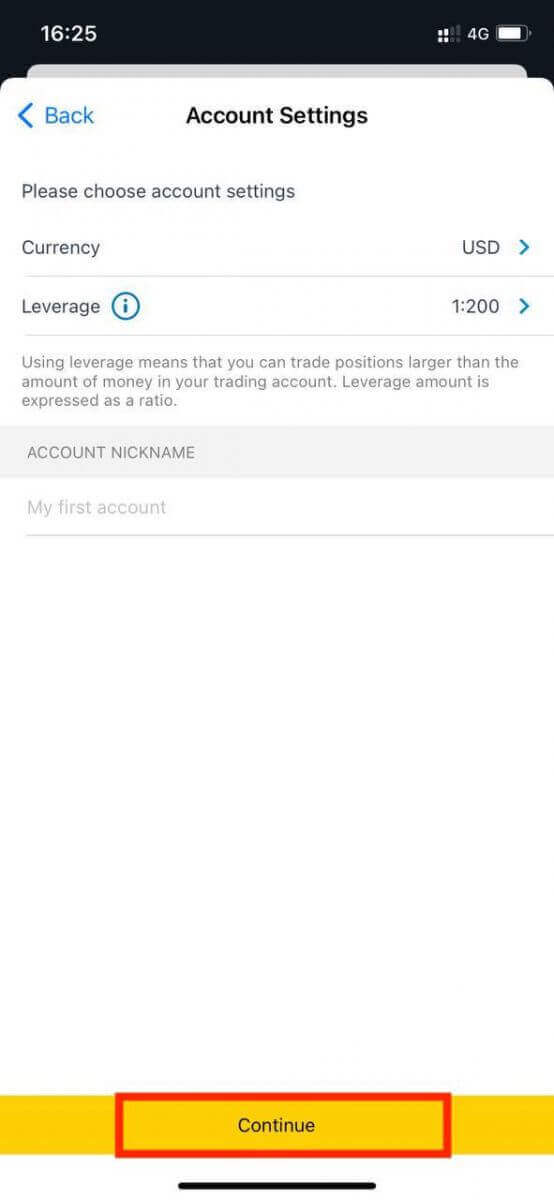
4. Set the account currency, leverage, and enter the account nickname. Tap Continue.
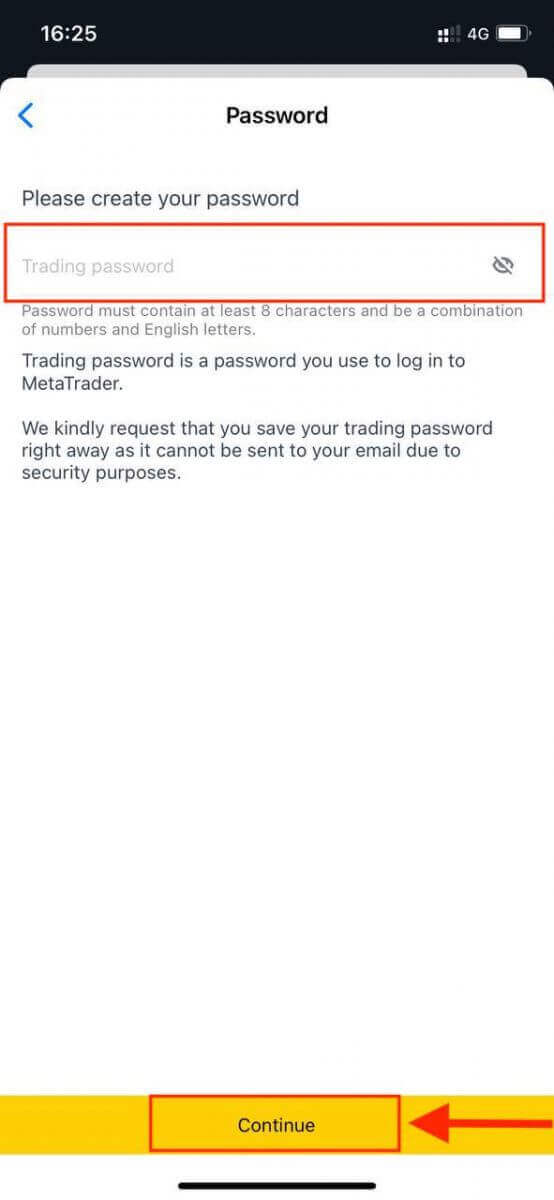
5. Set a trading password as per the displayed requirements.
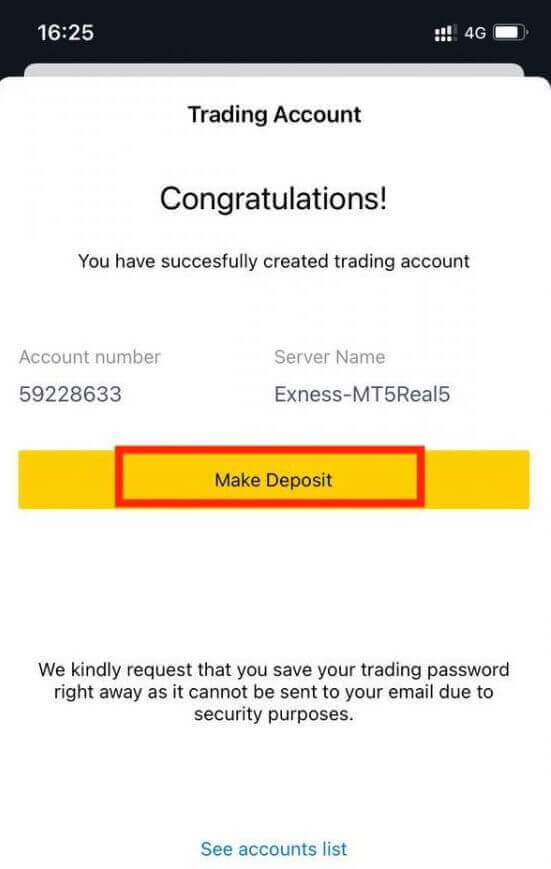
You have successfully created a trading account. Tap Make Deposit to choose a payment method to deposit funds and then tap Trade.
Your new trading account will show up below.
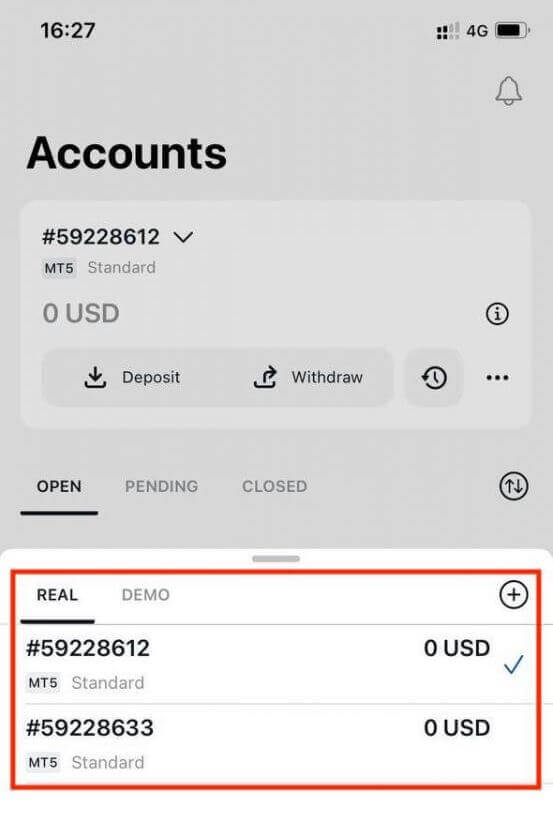
Note that the account currency set for an account cannot be changed once set. If you wish to change your account nickname, you can do so by logging on to the web Personal Area.
How to Verify Exness Account
When you open your Exness account, you have to complete an Economic Profile and submit Proof of Identity (POI) and Proof of Residence (POR) documents. We need to verify these documents to ensure that all operations on your account are performed by you, the genuine account holder to ensure compliance within both financial regulations and the law.
Watch the steps below to learn how to upload your documents to verify your profile.
How to Verify Account on Exness
We have prepared a guide for you to make sure you succeed in this document upload process. Let’s get started.
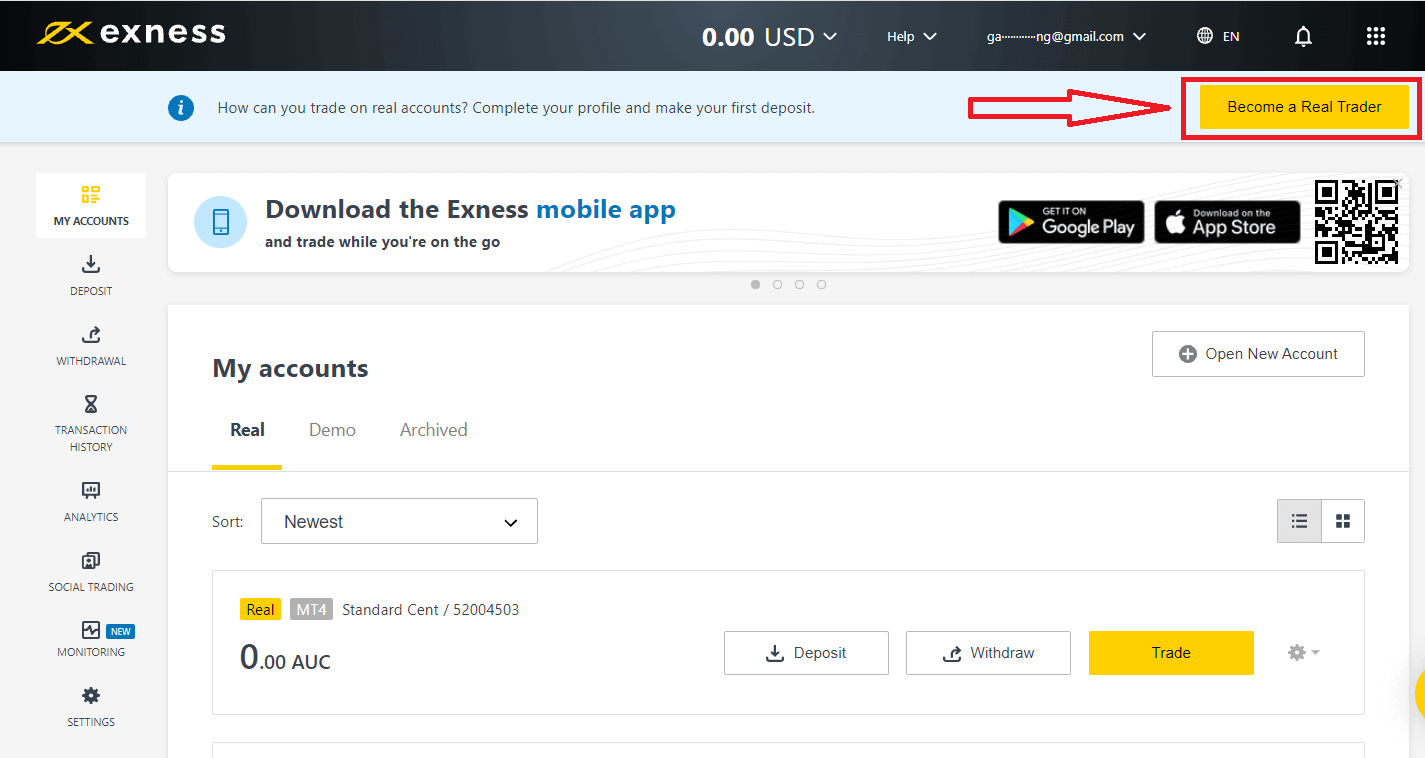
To begin, login to your personal area on the website, click "Become a Real Trader" to complete your profile
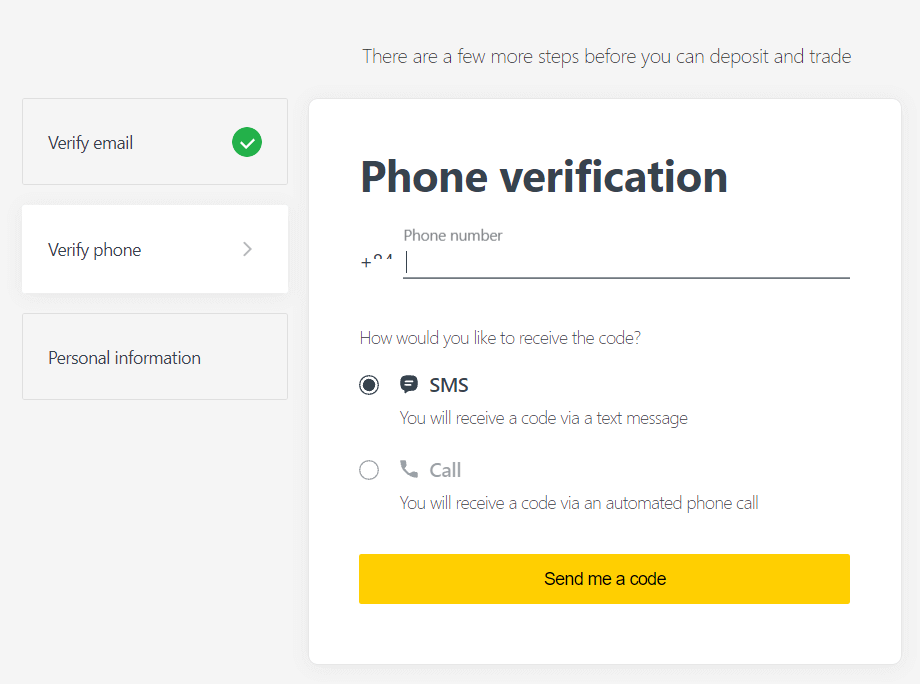
Enter your phone number and click "Send me a code" to confirm your phone number.
Enter your personal information and click "Continue"
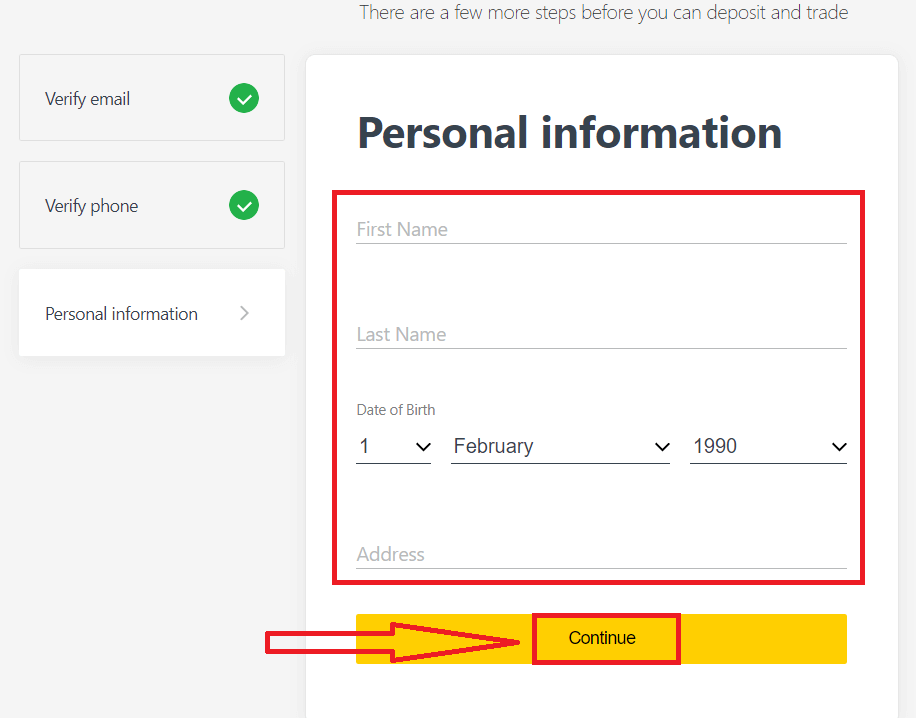
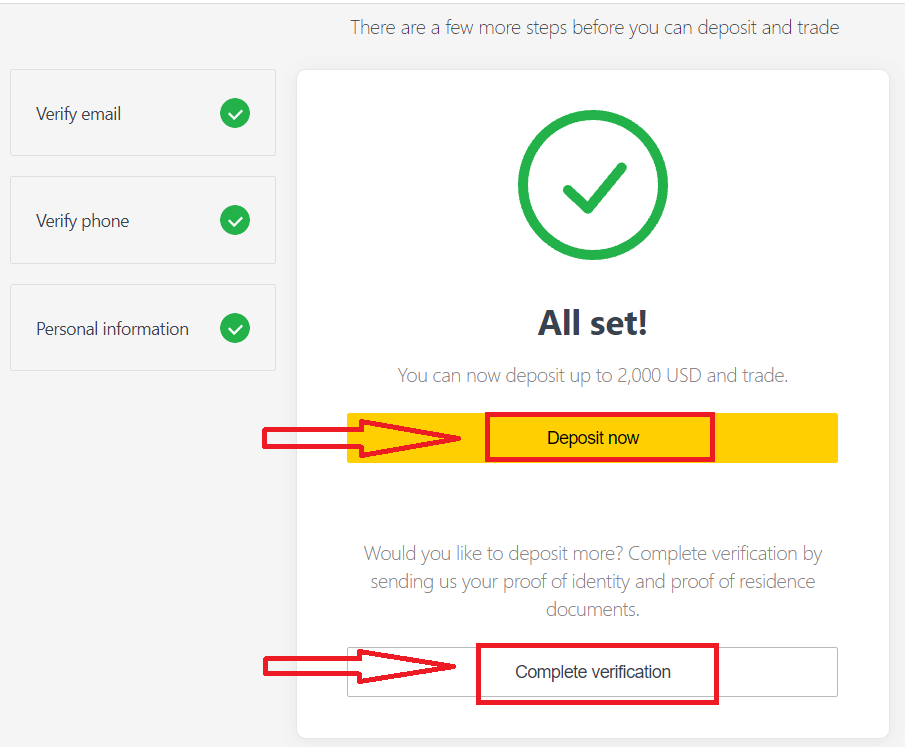
Now you can either make your first deposit by selecting "Deposit now" or continue verify your profile by selecting "Complete Verification"
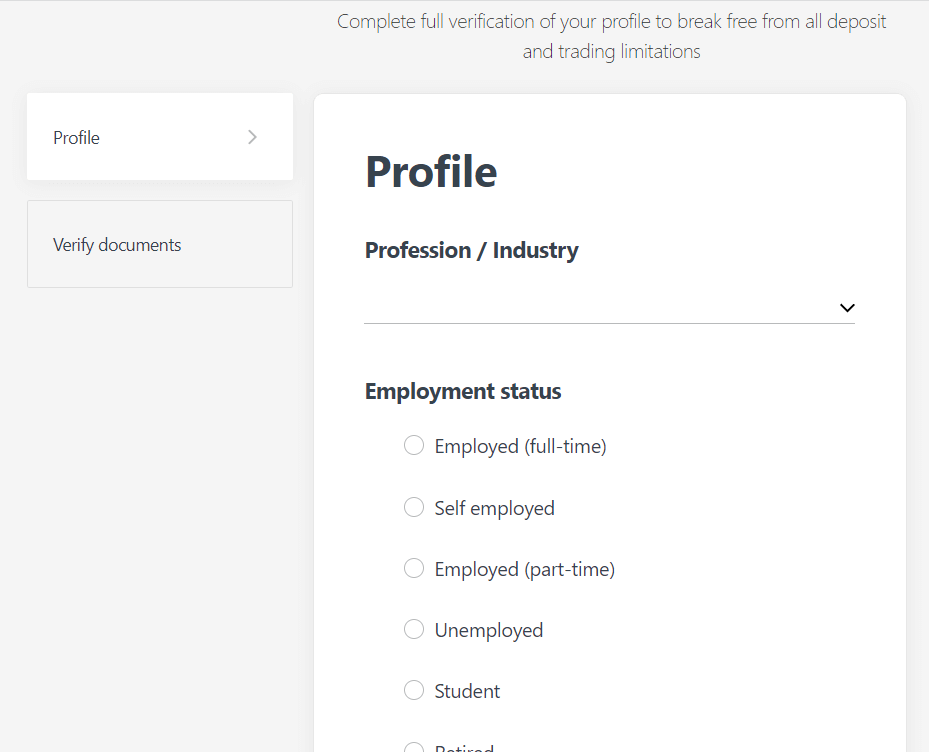
Complete full verification of your profile to break free from all deposit and trading limitations
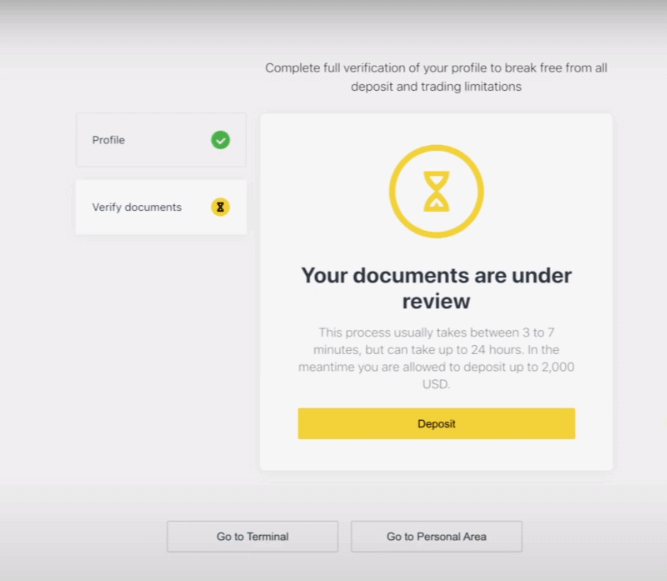
After completing full verification, your documents will be reviewed and your account are automatically updated.
Verification Document Requirement
Here are the requirements for you to keep in mind while uploading your documents. These are also displayed on the document upload screen for your convenienceFor Proof of Identity (POI)
- A document provided must have the client’s full name.
- A document provided must have a photo of the client.
- A document provided must have the client’s date of birth.
- The full name must match the name of the account holder and the POI document exactly.
- The client’s age should be 18 or above.
- The document should be valid (at least one month of validity) and not expired.
- If the document is two-sided, please upload both sides of the document.
- All four edges of a document should be visible.
- If uploading a copy of the document, it should be of high quality.
- The document should be issued by the government.
Accepted Documents:
- International Passport
- National Identity Card/Document
- Driver’s Licence
Formats accepted: Photo, Scan, Photocopy (All corners shown)
File extensions accepted: jpg, jpeg, mp4, mov, webm, m4v, png, jpg, bmp, pdf
For Proof of Residence (POR)
- The document should have been issued within the past 6 months.
- Name displayed on the POR document must match the full name of the Exness account holder and POI document exactly.
- All four edges of a document should be visible.
- If the document is two-sided, please upload both sides of the document.
- If uploading a copy of the document, it should be of high quality.
- The document should contain the clients full name and address.
- The document should contain the issue date.
Accepted Documents:
- Utility bill (electricity, water, gas, Internet)
- Certificate of residence
- Tax bill
- Bank account statement
Formats accepted: Photo, Scan, Photocopy (All corners shown)
File extensions accepted: jpg, jpeg, mp4, mov, webm, m4v, png, jpg, bmp, pdf
Please take special care as there are many documents (payslips, university certificates, for example) that are not accepted; you will be informed if a submitted document is not acceptable and are permitted to retry.
Verifying your identity and address is an important step that helps us to keep your account and financial transactions secure. The verification process is just one of a number of measures that Exness has implemented to ensure the highest levels of security.
Examples of incorrect documents uploaded
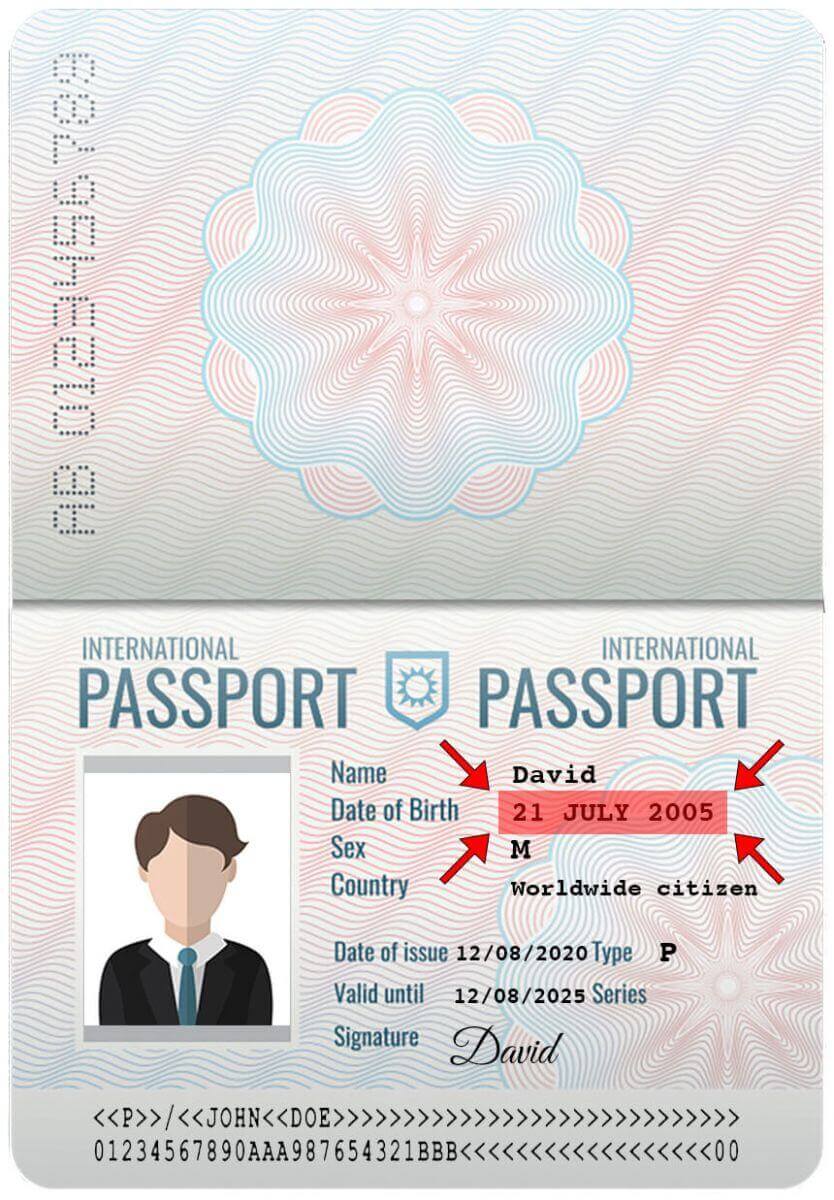
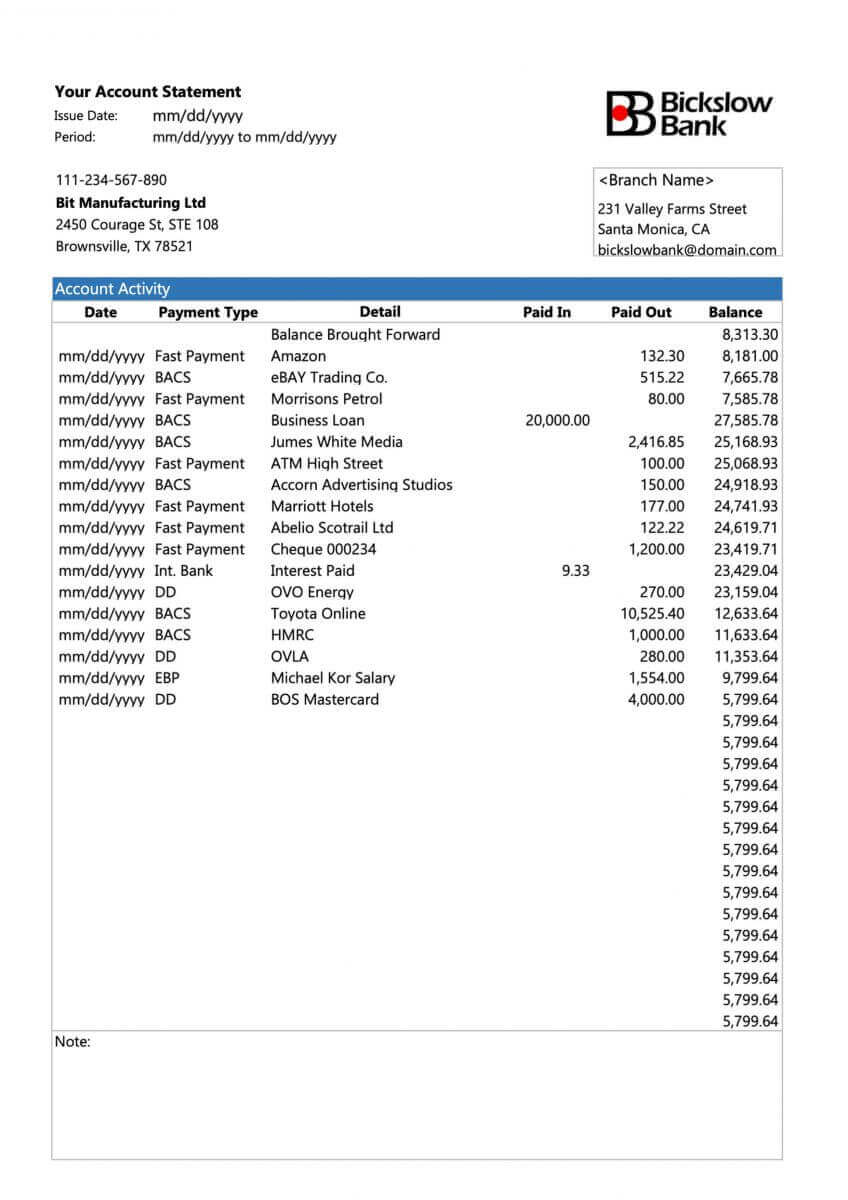
We have listed a few incorrect uploads for you to take a look at and see what is considered unacceptable.1. Proof of Identity document of an under-age client:
2. Proof of Address document without the name of the client
Examples of correct documents uploaded
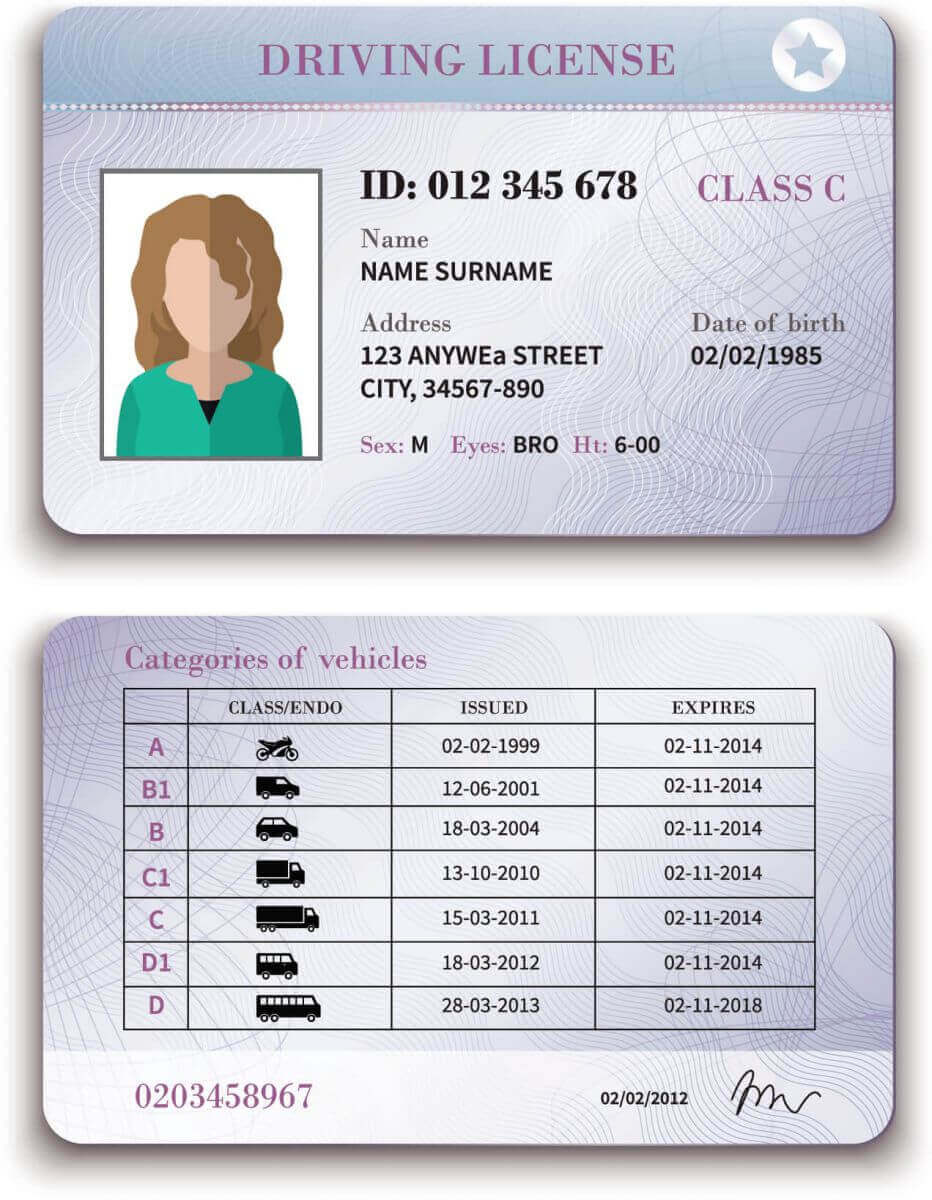
Let us take a look at a few correct uploads:1. Driver’s license uploaded for POI verification
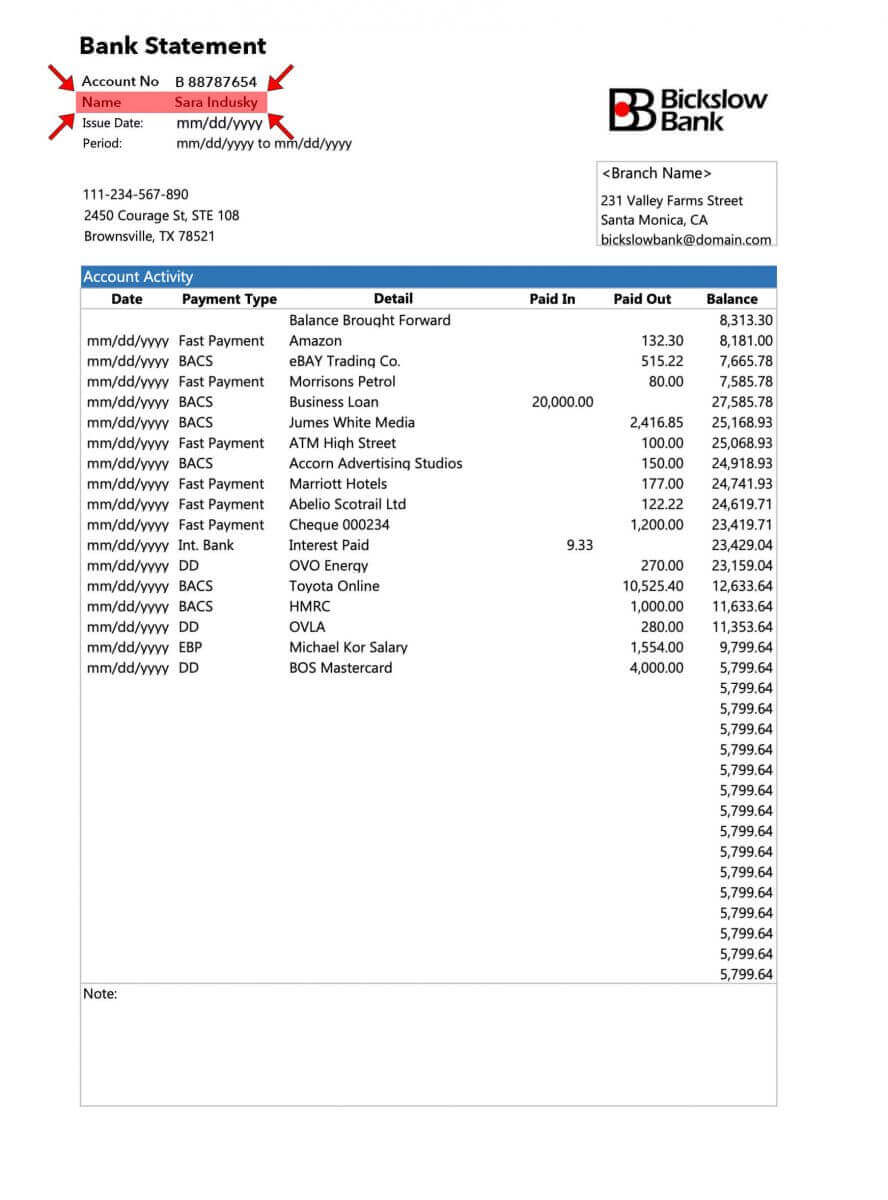
2. Bank statement uploaded for POR verification
Now that you have a clear idea of how to upload your documents, and what to keep in mind - go ahead and complete your document verification.
Frequently Asked Questions (FAQ)
Checking an account is fully verified
When you log in to your Personal Area, your verification status is displayed at the top of the Personal Area.

Your verification status is shown here.
Account verification time limit
From the time of your first deposit, you are given 30 days to complete account verification which includes verification of identity, residence and economic profile.
The number of days left for verification is shown as a notification in your Personal Area, to make it easier for you to keep track each time you log in.

How your verification time limit is shown.
About unverified Exness accounts
There are limitations placed upon any Exness account yet to complete the account verification process.
These limitations include:
- A maximum deposit of up to USD 2 000 (per Personal Area) after completion of Economic Profile, and verifying email address and/or phone number.
- A 30-day limit to complete account verification from the time of your first deposit.
- With proof of identity verified, your maximum deposit limit is USD 50 000 (per Personal Area), with the ability to trade.
- These limitations are lifted after complete account verification.
- If your account verification is not complete within 30 days, deposits, transfers, and trading functions will not be available until the Exness account is fully verified.
The 30-day time limit applies to partners from the moment of their first client registration, while withdrawal actions for both partner and client are disabled in addition to deposits and trading after the time limit.
Deposits with cryptocurrency and/or with bank cards require a fully verified Exness account, so cannot be used at all during the 30-day limited function period, or until your account is fully verified.
Verifying a second Exness account
If you decide to register a second Exness account, you may use the same documentation that was used to verify your primary Exness account. All usage rules for this second account still apply, so the account holder must also be the verified user.
How long does it take to verify an account?
You should receive feedback on your submitted Proof of Identity (POI) or Proof of Residence (POR) documents within minutes, however, it can take up to 24 hours per submission if the documents require advanced verification (a manual check).
Note: POI and POR documents can be submitted at the same time. If you wish, you can skip the POR upload and do it later.
Conclusion: Secure Your Trading with a Verified Exness Account
Registering and verifying your account on Exness is a crucial step toward a secure and seamless trading experience. By following the outlined steps, you can quickly set up and verify your account, allowing you to fully access the platform’s features and start trading with confidence. A verified account not only enhances your security but also ensures that you are trading in a compliant and regulated environment.

